Few things are more frustrating for drone operators than preparing for a flight only to discover your drone won’t connect to the controller. This common issue can bring your operations to a halt, whether you’re conducting agricultural surveys, capturing aerial footage, or performing professional inspections. Understanding the causes and knowing how to troubleshoot connection problems can save you valuable time and get you back in the air quickly.
At NQ Aerovation, we work with professional drone operators across Australia every day, helping them maintain their equipment and overcome technical challenges. Our experience with the DJI Agras series and other professional-grade drones has given us deep insight into connection issues and their solutions. This comprehensive guide will walk you through the most common causes and proven fixes for drone controller connection problems.
Understanding Drone-Controller Communication
Modern drones communicate with their controllers through sophisticated wireless systems, typically using radio frequencies in the 2.4 GHz or 5.8 GHz bands. This communication link is critical for transmitting control commands, receiving telemetry data, and streaming live video. When this connection fails, the drone becomes unresponsive and potentially unsafe to operate.
The connection process involves several components working together: the controller’s transmitter, the drone’s receiver, firmware on both devices, and the wireless protocol that governs their communication. A failure in any of these elements can prevent successful pairing.
Common Causes of Connection Failures
1. Power and Battery Issues
The most fundamental cause of connection problems is insufficient power. Both your drone and controller need adequate battery charge to establish and maintain a connection. Low battery levels can cause erratic behavior, intermittent connections, or complete failure to pair.
What to check:
- Ensure both drone and controller batteries are fully charged
- Check for damaged or swollen batteries that may not hold proper charge
- Verify battery contacts are clean and making proper connection
- Confirm batteries are correctly seated in their compartments
2. Firmware Mismatches
Firmware incompatibility is one of the leading causes of connection issues, especially after updates. When your drone and controller are running different firmware versions, they may fail to communicate properly or refuse to connect altogether.
This commonly occurs when:
- Only one device (drone or controller) has been updated
- An update was interrupted or failed to complete properly
- You’re using equipment that hasn’t been updated in a long time
- Third-party apps or modifications have affected firmware
3. Physical Obstructions and Interference
Radio signals require a clear path between the controller and drone. Physical barriers, electromagnetic interference, and environmental factors can all disrupt the connection process.
Common interference sources include:
- WiFi routers, mobile hotspots, and other wireless devices
- Power lines, electrical substations, and radio towers
- Metal structures, buildings, and vehicles between controller and drone
- Other drones or radio-controlled devices operating nearby
- Weather conditions such as heavy rain or electrical storms
4. Incorrect Binding or Pairing
Each drone must be properly bound to its controller to establish a secure, unique connection. If the binding information is lost or corrupted, the devices won’t recognize each other.
Binding issues can result from:
- Factory reset or settings cleared on either device
- Attempting to use a controller with a different drone without proper re-pairing
- Corruption of stored pairing data due to power loss during operation
- Software glitches or bugs affecting the pairing process
5. Hardware Malfunctions
Physical damage or component failure can prevent successful connections. These issues often require professional diagnosis and repair.
Hardware problems include:
- Damaged antennas on controller or drone
- Faulty USB cables or connection ports
- Water damage affecting internal electronics
- Worn or corroded connection points
- Failed radio modules or communication chips
6. Mobile Device and App Issues
Many modern drones require a smartphone or tablet running a companion app. Problems with these mobile devices can prevent controller connection.
Mobile-related issues:
- Outdated or incompatible app versions
- Insufficient device permissions (camera, location, storage)
- Conflicting apps or background processes
- Low memory or storage space on mobile device
- Faulty USB cable connecting device to controller
Step-by-Step Troubleshooting Guide
Follow these troubleshooting steps in order. Each step builds on the previous one, moving from simple fixes to more complex solutions.
Step 1: Perform Basic Checks
- Fully charge both drone and controller batteries
- Power off both devices completely, wait 30 seconds, then power them back on
- Ensure you’re in an open area away from obvious interference sources
- Check that all cables are securely connected
- Verify mobile device has sufficient battery and storage
This simple restart resolves connection issues in approximately 30-40% of cases, as it clears temporary glitches and resets the communication protocol.
Step 2: Check and Update Firmware
- Open your drone manufacturer’s app on your mobile device
- Check for firmware updates for both drone and controller
- Download and install any available updates
- Ensure updates complete fully without interruption
- Restart both devices after updates are installed
Important: Always update both the drone and controller to matching firmware versions. Never fly immediately after an update without testing the connection in a safe environment.
Step 3: Re-bind or Re-pair Devices
The re-pairing process varies by manufacturer, but generally follows this pattern:
- Locate the pairing or binding button on your drone (often near the battery or on the body)
- Locate the pairing button on your controller
- Power on the controller first and wait for it to fully initialize
- Power on the drone
- Press and hold both pairing buttons simultaneously for 3-5 seconds
- Wait for confirmation lights or sounds indicating successful pairing
- Test the connection by attempting a short flight in a safe area
Consult your specific drone’s manual for exact pairing procedures, as button locations and sequences vary between models.
Step 4: Reset Network and Connection Settings
If pairing doesn’t resolve the issue, try resetting connection settings:
- Access the drone app’s settings menu
- Look for “Reset Network Settings” or “Connection Settings”
- Clear any cached connection data
- Restart both devices
- Attempt connection again from scratch
Step 5: Check for Physical Damage
Inspect your equipment thoroughly:
- Examine antennas for bends, breaks, or loose connections
- Check USB ports and cable connections for damage or debris
- Look for signs of water damage or corrosion
- Verify battery contacts are clean and undamaged
- Ensure the gimbal and other components aren’t obstructing antennas
If you discover physical damage, professional repair is recommended. Attempting DIY fixes on sophisticated drone electronics can void warranties and cause additional problems.
Step 6: Eliminate Interference
Move to a different location and try again:
- Find an open area away from buildings and power lines
- Turn off nearby WiFi devices and mobile hotspots
- Switch to a different frequency band if your controller supports it (2.4 GHz vs 5.8 GHz)
- Try connecting at different times of day when radio traffic may be lower
Step 7: Factory Reset (Last Resort)
If all else fails, a factory reset may be necessary. Warning: This will erase all custom settings, calibrations, and configurations.
- Back up any important settings or flight logs if possible
- Locate the factory reset option in your drone’s settings menu
- Perform reset on both controller and drone
- Update firmware to the latest versions
- Re-pair devices following manufacturer instructions
- Recalibrate compass, IMU, and other sensors as needed
Preventing Future Connection Problems
Proactive maintenance and good operating practices can minimize connection issues:
Regular Maintenance
- Keep firmware updated on all devices
- Clean battery contacts and ports regularly
- Store equipment in a dry, temperature-controlled environment
- Inspect antennas and cables before each flight
- Replace batteries that show signs of age or damage
Best Operating Practices
- Always power on controller before drone and power off in reverse order
- Allow devices to fully initialize before attempting flight
- Avoid flying in areas with known interference
- Keep backup controllers and batteries for critical operations
- Document any connection issues for pattern recognition
Software Management
- Update apps and firmware together, never individually
- Test new firmware in controlled environments before field use
- Keep mobile devices updated and optimized
- Close unnecessary background apps before flying
- Use high-quality, certified USB cables
When to Seek Professional Repair Services
Some connection problems require expert diagnosis and repair. You should seek professional help when:
- Connection issues persist after trying all troubleshooting steps
- You suspect physical damage to internal components
- The drone has been exposed to water or extreme conditions
- Error messages indicate hardware failures
- The equipment is under warranty and you want to avoid voiding it
- You need the drone operational quickly for time-sensitive work
Professional repair services offer several advantages over DIY attempts:
- Access to genuine replacement parts and specialized tools
- Expert diagnosis that identifies root causes, not just symptoms
- Warranty protection and service guarantees
- Comprehensive testing to ensure complete functionality
- Documentation of repairs for insurance and maintenance records
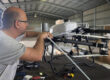
NQ Aerovation Professional Repair Services
At NQ Aerovation, we understand that downtime costs money and disrupts your operations. Our professional repair services are designed to get you back in the air quickly and reliably.
Our Expertise
With extensive experience servicing the DJI Agras series and other professional-grade drones, we have the knowledge and tools to diagnose and repair complex connection issues. Our technicians work with these systems daily, giving us insight into common problems and effective solutions.
Comprehensive Diagnostics
We don’t just treat symptoms; we identify root causes. Our diagnostic process examines all aspects of your drone’s communication system, from antenna integrity to firmware configurations, ensuring we address the actual problem.
Quality Repairs
We use genuine parts and follow manufacturer specifications for all repairs. Every repaired drone undergoes thorough testing before being returned to service, ensuring reliable operation when you need it most.
Fast Turnaround
We know you can’t afford extended downtime. Our efficient repair processes minimize the time your equipment spends out of service while maintaining the highest quality standards.
Learn more about our repair services: NQ Aerovation Drone Repair
Tips for DJI Agras Series
If you’re operating DJI Agras drones (T100, T50, or T40), here are some model-specific considerations:
Agras Connection Sequence
- Power on the remote controller first
- Wait for the controller to complete its startup sequence
- Power on the aircraft
- Wait for GPS signal acquisition (this can take 1-2 minutes)
- Verify all systems show green status before attempting flight
Agras-Specific Considerations
- Agricultural work environments often have metallic equipment that can cause interference
- The larger size and weight of Agras drones means more powerful antennas, but also potentially more points of failure
- Spray systems and tanks can affect signal if not properly grounded
- Regular cleaning is essential as agricultural chemicals can corrode connections
Quick Reference Troubleshooting Checklist
Print and keep this checklist with your equipment for quick reference:
- Batteries fully charged? (Both drone and controller)
- Firmware versions match? (Check app for updates)
- Devices restarted? (Power off 30 seconds, then on)
- Clear area? (No obvious interference sources nearby)
- Cables secure? (Check all connections)
- Antennas intact? (No visible damage)
- App updated? (Latest version installed)
- Permissions granted? (App has all necessary access)
- Binding current? (Try re-pairing if needed)
- Environment suitable? (Weather conditions acceptable)
Conclusion
Connection issues between drones and controllers are frustrating but usually solvable. By following the systematic troubleshooting steps outlined in this guide, you can resolve most problems and get back to productive flying. Remember that prevention through regular maintenance and proper operating procedures is always easier than repair.
When troubleshooting doesn’t resolve the issue, or when you need guaranteed results quickly, professional repair services are your best option. Don’t let connection problems ground your operations longer than necessary.
Get Expert Help Today
Experiencing persistent connection issues? NQ Aerovation’s expert technicians are ready to help. We provide professional drone repair services across Australia, specializing in agricultural drones and professional-grade equipment.
Contact us today: Contact NQ Aerovation
Contact Details
Phone: +61 404 621 187
Email: info@nqaerovation.com.au